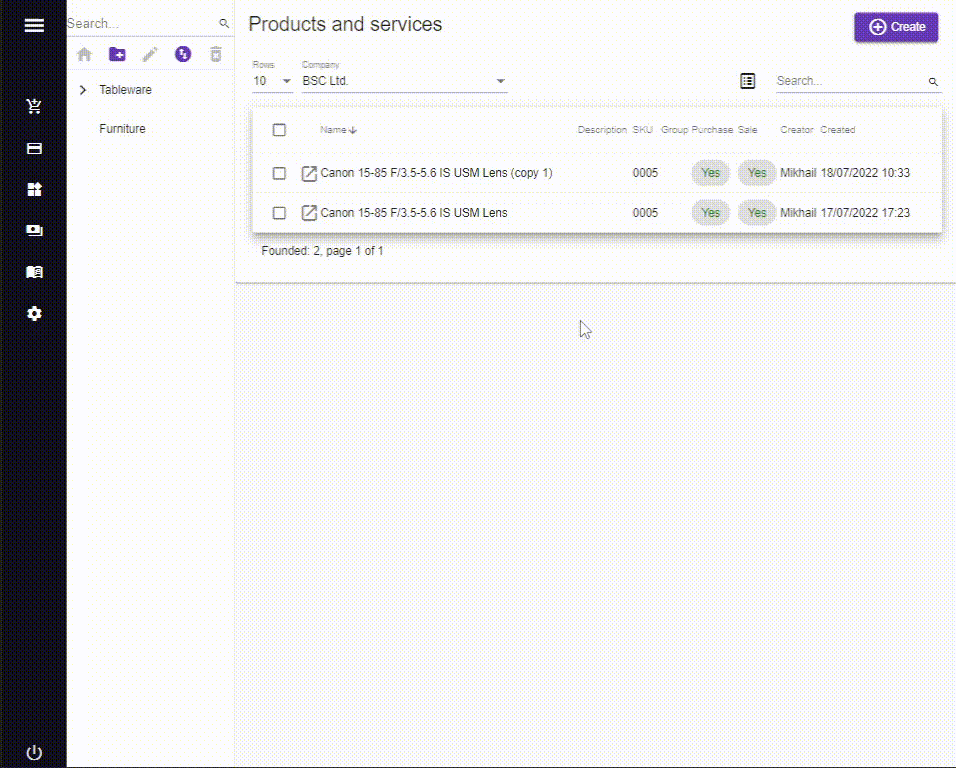
Products and Services
Products and services is one of the most important DokioCRM documents. It describes the products or services that you buy or sell.
The menu of Products and services document is here: Products -> Products and services.
Categories
In the left side of Product and services menu you can see a categories bar.
You can find general information about working with categories here
The detailed information about categories of a Product and service documents is here
Document
Add a new product or a service
After registration, by default there is no items in Products and services menu.
To create a product or a service:
- Go to Products → Products and services
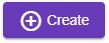
- Click on the Create button
- Select your Company for which the product is being created (in case you have more than one company in DokioCRM)
- Enter the Name (the mandatory field) and Description, if required
- In the field Subject of trade select Commodity (for a product) or Service (for a service).
- Select the tax in the Tax field if required.
- Input SKU value, if required, and the last mandatory field is Unit of measurement
- If this product is not in sale (for example it is used as expendable material) - switch on the Not in sale switcher
- If this product can’t be sold by parts - switch on the Indivisible switcher
- Select categories. If you want to select whole branch of categories - click by lower child category and then click on the Select all categories button
- Then click the Create button
 and the document of your product will be created
After the document creation, new blocks and fields will appear in the Main information block.
Information tab
Main information section
This section has the following fields:
Name - the name of product
Subject of trade - can be Commodity or the Service.
Tax - the tax with which this product is usually sold
SKU - the SKU (article) identificator of this product
Unit of measurement - the unit of measurement of product
Description for the label - Short text description of product. This description can be printed on the product label or price tag.
Removed from sale - select if this product in not in sale. It will be not shown in the serch products list of the Shipment document, and this product will not be available in the online store.
Not purchased - choose if you no longer buy this product. The product will be not shown in the serch products list of the Acceptance document.
Indivisible - Select if this product can't be split or partially sold.
ID - the ID of a product. It will be used in the Bar-code of the product. ID will be assigned to the product automatically by adding 1 to the previous product ID.
Remove from sale after sale - select if your product is unical and you want to remove it from the sale after it has been sold. For example, it can be hand made toy or the collectible.
Weight - the weight of the product.
Volume - the volume of the product.
Prices section
In this block you can set all prices of the product.
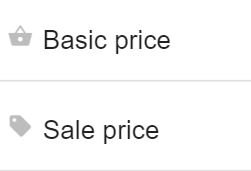
If you have an online store, and the Online store switcher in your company card is on, the prices can be marked by icons as regular (the basket icon) or sale (the price tag icon) price:
Suppliers section
Here you can select one or more suppliers of this product.
Bar-codes section
Shows all bar-codes associated with this product.
To add bar-code:
- Click the Add barcode button
 .
. - Then, in the Barcode adding dialog fill the field Barcode. You can use the bar-code scaner in HID mode for this action.
- Fill the Description field if it’s required. The type of a bar-code in the Type of barcode field will be selected automatically, depending on the value of Barcode field.
- Also, you can generate the internal EAN13 bar-code automatically. Click the Internal EAN-13 link under the Barcode field. This barcode will be generated from the ID field of the product.
- Department - the department where the operation was completed
- Operation - the name of the operation
- Quantity before - the quantity of this product in the department before the operation
- Change - the quantity of the product in this operation
- Quantity after - the quantity of this product in the department after the operation
- Date of operation - the date of the operation
- Price of operation - the price of the operation
- Net cost of operation - the net cost of the product in this operation.
- Average net cost - the average net cost of this product after the operation. The Average net cost price will be recalculated after every operation, if the cost of the product changes.
The calculating formula of the new Average cost is:
((QUANTITY_AVAILABLE*AVERAGE_NET_COST) + QUANTITY_NEW_ITEM * NEW_ITEM_NET_COST) / QUANTITY_AVAILABLE + QUANTITY_NEW_ITEM
Where:
QUANTITY_AVAILABLE - the available quantity of this product before the operation.
AVERAGE_NET_COST - the average net cost of this product before the operation
QUANTITY_NEW_ITEM - the quantity of the product with the new net cost in the operation.
NEW_ITEM_NET_COST – the new net cost in the operation
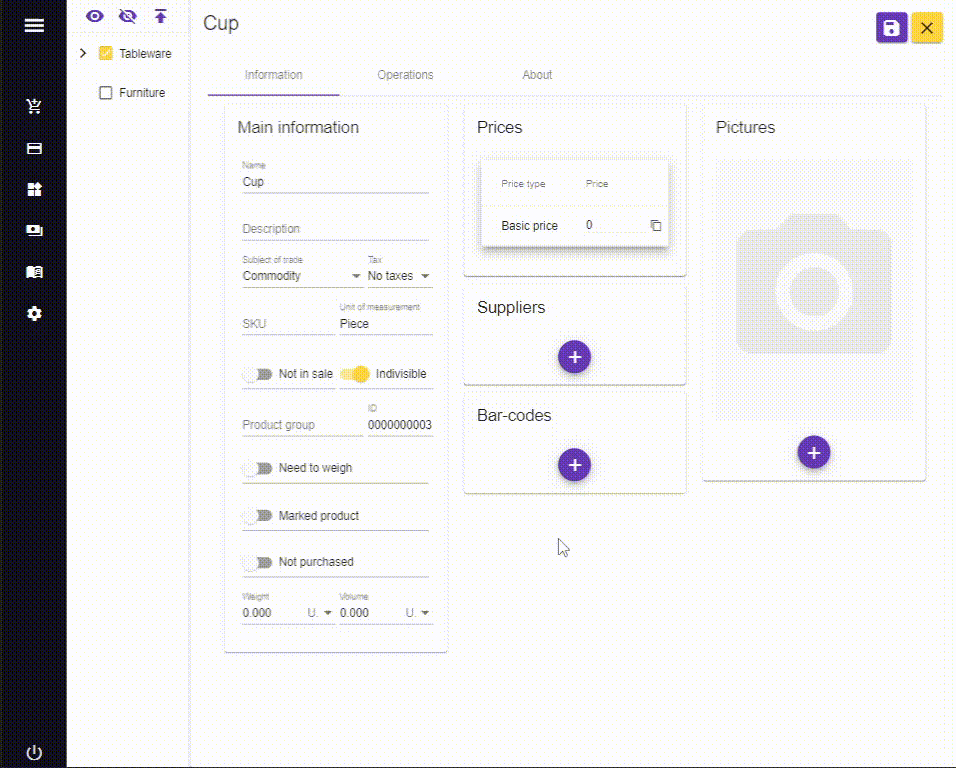
Pictures section
Here you can add pictures of your product. To do this, click the Add picture button . DokioCRM Files window will be opened. Select one or more pictures. If the picture is still not in the Files, click the Upload button and upload your pictures. After uploading all uploaded pictures will be in the beginning of the pictures list. Select pictures and click Select files button. The pictures of the product will be added.

The main picture of product is on the top. You can change the main picture by dragging another picture on the top of the product pictures list.
When all changes are made, click the Save button.
Pay attention!
If you want to use these product pictures in your online store, the pictures should be able to the external access. Otherwise these pictures won't be visible in the online store. Detailed about external access and how to make files able to the external access you can read in the manual of Files registry here .
Operations tab
In this tab you can form the Operations report for this product.
Select the Department, From date and To date and click the loupe icon  .
.
DokioCRM will find all operations on this product in the selected period of time.
If you want to see the report only on specific operations - click the Select operations icon  and uncheck the unnecessary operations. Then click the loupe icon.
The table rows:
Online store tab
This tab is available only if your company has created an least one Online store connection.
Product properties section
In this section you can describe the basic product properties for the online store.
Product type - the type of product. For now, only the Simple and Variable product types are accessible. The description of the fields in the tabs will be for a Simple product. For more information about working with variable products and variations, see the section Variable products.
Below is the main block of product properties:
General tab
This section is available only for the Simple products.
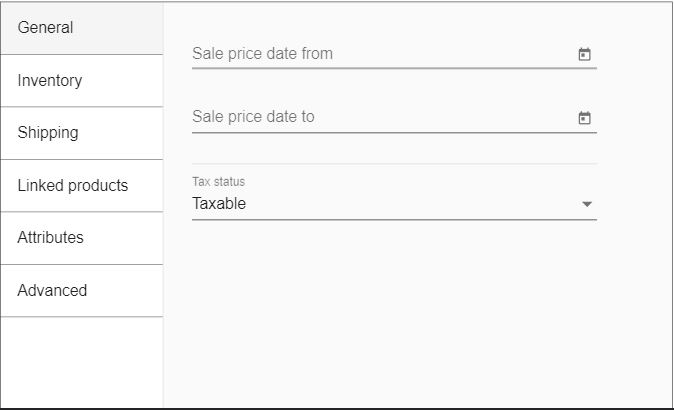
The next two fields are for manage sale dates. If current date is between these two dates, then product has a sale price. You can set the type of price for sale in Online store connection, in a Regular price field:
Sale price date from - sale price activation date.
Sale price date to - sale price termination date.
Tax status - select the tax status of the product in the online store. It is available only if your company is a payer of VAT, or sales taxes. To switch on the taxes go to Settings->Companies, and in a "Main information" section switch on the Sales tax payer. Also you can switch on the field Tax included, if your prices inclusive of tax.
Inventory tab

SKU - the same as a SKU field in the Main information section. These fields are linked and copy each other's values.
Manage stock - select if you need to manage the stock quantity on this individual product
Stock status - (Available only if Manage stock is off). Select the stock status of this product. It can be In stock, Out of stock and On backorders. This field also affects the value of Removed from sale field (true and vice versa).
Allow backorders - choose how your online store will work with backorders.
Low stock threshold - (Available only if Manage stock is on) - the amount of product, at which WooCommerce sends you a message about reaching the minimum quantity of this product in stock.
Sold individually - enable this to allow the purchase of just one item in a single order. This is useful if you are selling one-of-a-kind items, limited editions, or collectibles.
Shipping tab
Height, Length, Width, Weight - product characteristics corresponding to their field names.
Linked products tab
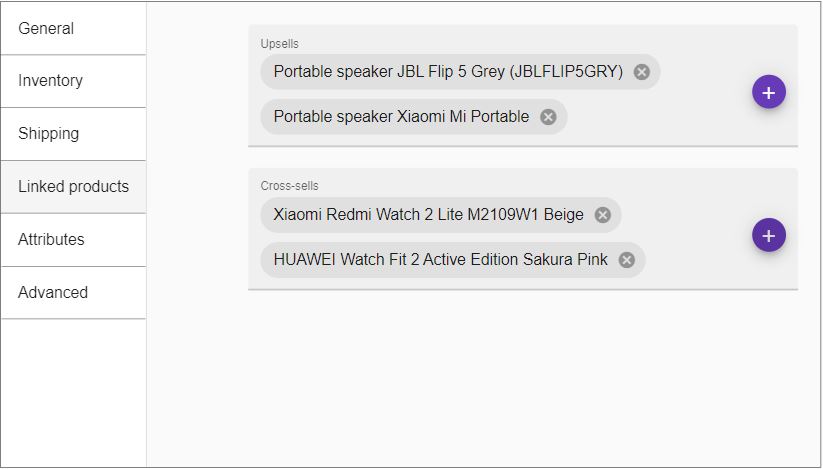
Upsells - upsells are products that you recommend instead of the currently viewed products. Upsells (user defined) are shown on the product page.
Cross-sells - Cross-sells are products that you promote in the cart, based on the current product.
Usually they are complementary items. For example, if you are selling a laptop, cross-sells might be protective cases, stickers or special adapters. Depending on your theme template, they may be displayed on the cart page underneath the cart products table with a thumbnail image. Cross-sells (user defined) are shown on the cart page
Attributes tab
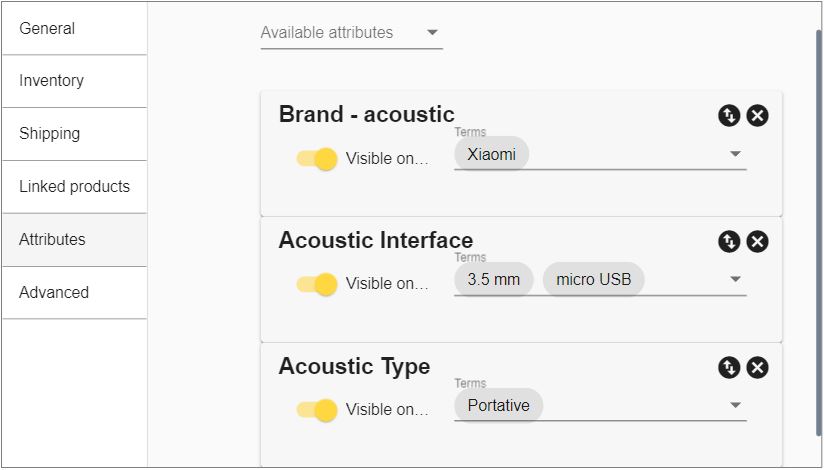
Here you can add the attributes to your product. All attributes should be previously created in the Product attributes registry.
To add an attribute click by its name in the list of Available attributes field. Then select one or more attribute terms.
Advanced tab
Purchase note - a short message that you can add to an order in WooCommerce. By default, purchase notes are displayed on the order details page and in emails sent to the customer.
Menu order - WooCommerce allows you to set custom position for individual products. Numbers can be set from 0 to 10. The lower the number - the higher the product position in the category products list.
Enable reviews - enable users to leave reviews for this product, in case if you want to.
Variable products and variations
Sometimes you may want to create multiple products with similar properties but different parameters.
For example, you are the owner of a pizzeria, and you have "Pizza Margherita" on your menu.
You sell 2 different sizes - Margherita Pizza Large and Margherita Pizza Small.
If you don't want to display two nearly identical pizzas on your website menu, you should use a variable product. Then these two pizzas will be variations of one variable product - Margherita Pizza, which will be presented in the store. And when the user clicks on the "Pizza Margherita" - he can choose between two options - "Big" and "Small".
So, the Variable product is just a wrapper for sold similar products, giving them a common name for the product catalog in the online store.
To create Variable product and add the variations into it (this example based on the pizza example above):
1. Create 2 products Margherita Pizza Large and Margherita Pizza Small. I'll create them with Subject of trade as a "Service", because it is not purchaseable products, it is more similar to the delivery pizza service. Set the prices for each of these products: big: 10, small: 7.50
2. Create new product with name "Pizza Margherita".
3. Go to the "Online store" tab of this product document.
4. In a Product properties section find Product type field and select "Variable product".
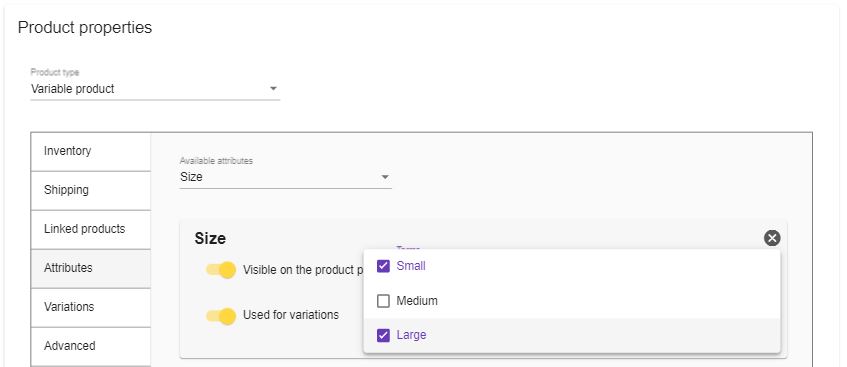
5. Go to the "Attributes" tab and in a Available attributes field select "Size" attribute. If you can't find the desired attribute, you can create it in accordance with this instruction.
6. In the card of added attribute select Used for variations, and in the Terms field select "Small" and "Large":
7. Go to the "Variations" tab:
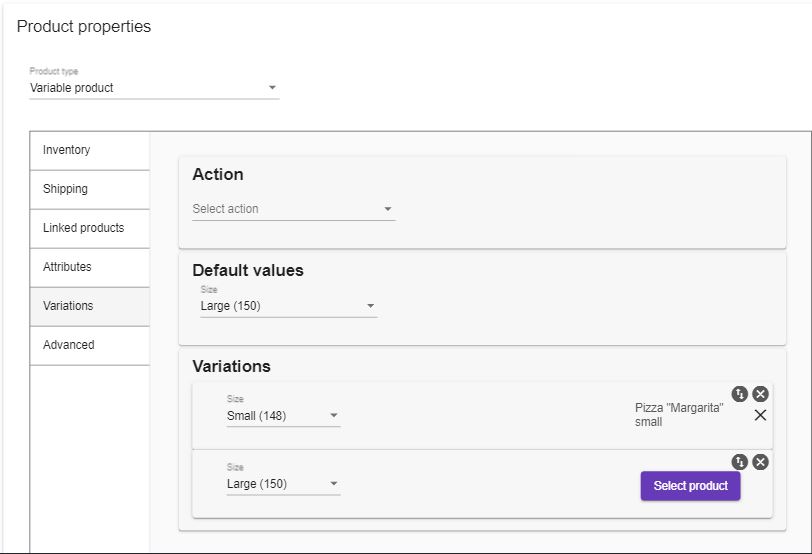
8. In the Action card select "Generate all possible variations". Two variations will be generated.
9. In the Default values card select "Large". This variation will be shown in the product card of online store by default.
10. In the Variations card you need to match the product for each variation. Click "Select product" button and select desired product.
11. When all variations are matched, click Save button.
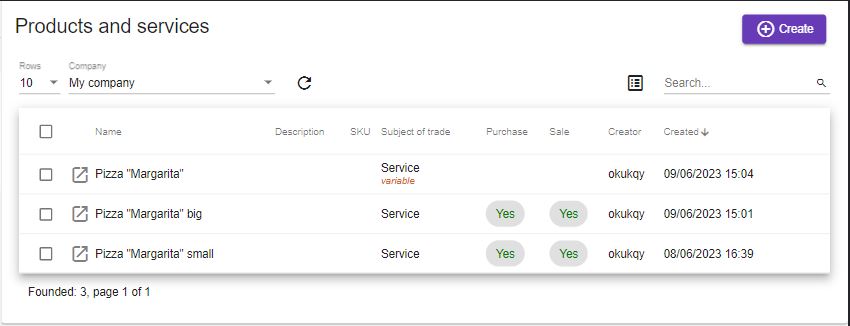
The result of these manipulations in a Products and services menu will look like this:
Description section
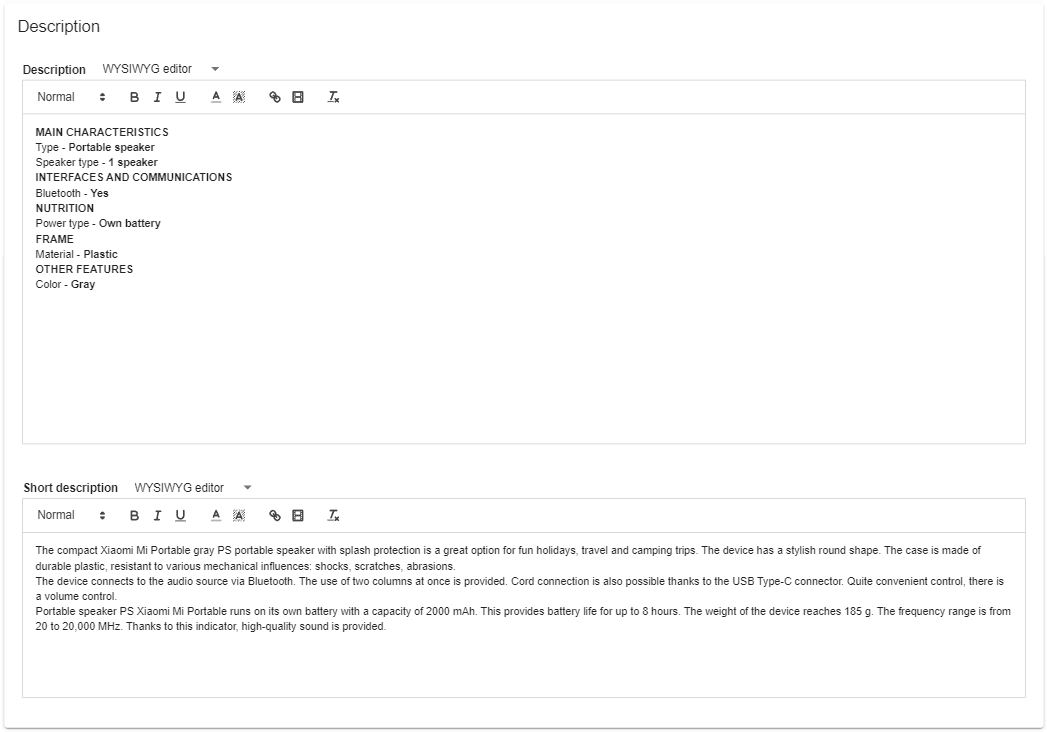
In this section you can write either full or short variant of the product description for the online store. There are two variations of description creation: WYSIWYG editor and native html. If you choose WYSIWYG editor, then you can use only the format text possibilities that this editor gives you. This is enough for a simple description. If you want to create more complex descriptions, for example tables, formatted text with pictures - you should select HTML editor.
As CMS WordPress does not accept style and script tags in publication texts, you can either use styles built into the tags like <span style="color:red">, or write styles and scripts in the functions.php file through the WordPress admin panel.
Group change of product categories.
In the Products and services menu select the products which categories you want to change. Click Actions button  and select Categories. In the left side of the Category selection dialog select the categories by clicking «plus» icon. All the selected categories will be added into the right side of this dialog. If you want to delete the category from the list of selected categories, click delete icon in the right side of the category name. Click the Select button at the top of Category selection dialog. Then you will see the dialog that will ask you - «Would you like to save the categories that the products already have?» If you select Yes - the selected categories will be added to the existing ones, otherwise the already existing categories will be replaced by the selected ones.
Translation of products and services
If you have an Online-store document with a language code other than the default language code in your Company's document settings, you will be able to translate this product or service into that language. Click on the Translation mode button ![]() and you will be in translation mode:
and you will be in translation mode:
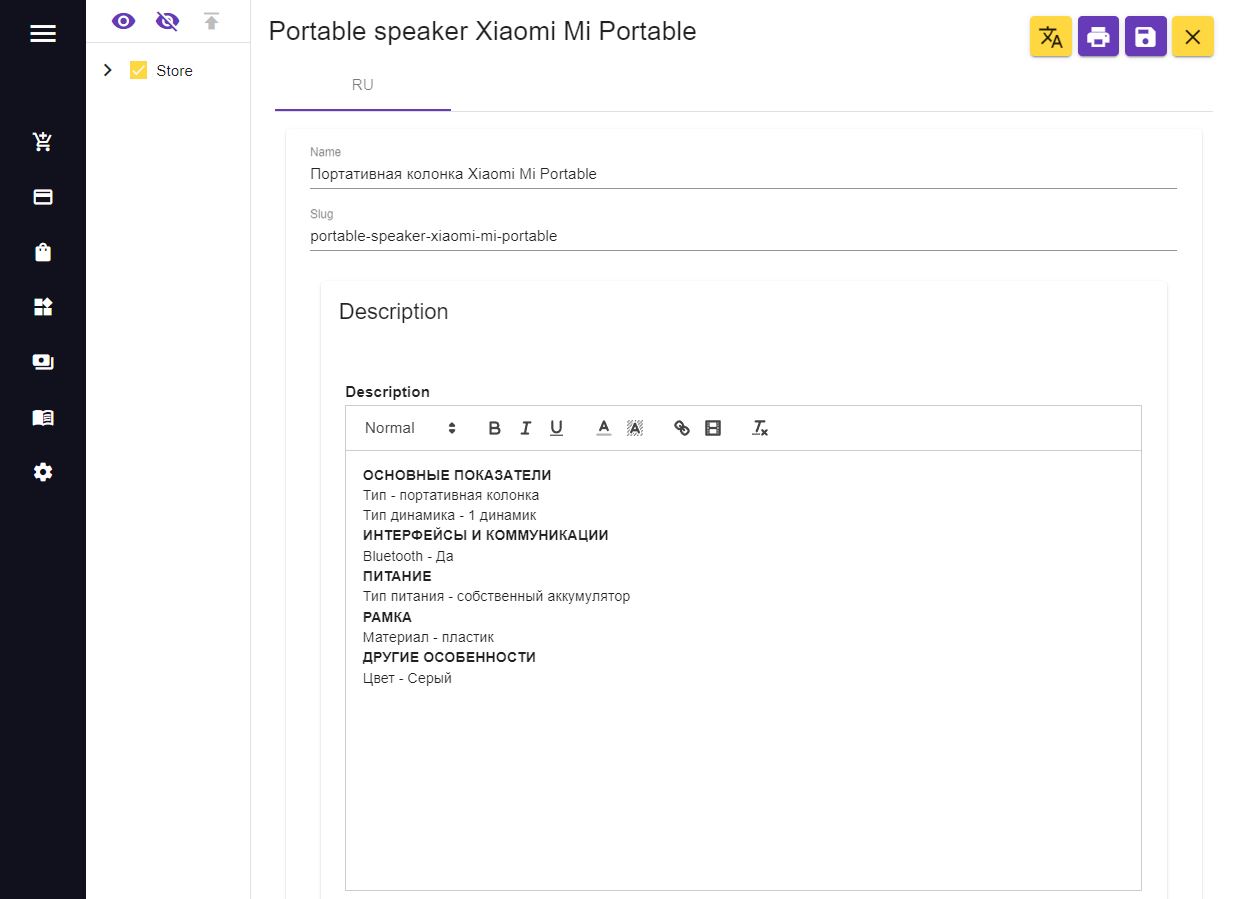
Select the desired language for translation in the top tab bar, and then input the translated name, slug (optional) and descriptions.
To go out of the translation mode just click on the Translation mode button again.
Delete the product
To Delete the product or service select it from the Products and services menu, click the Actions button and then click Delete.